Are you tired of the endless trips to the pet store to get feeders for your reptiles? Is the smell of dying crickets permeating your household? There’s an easy solution: set up a dubia roach colony! They are easier to breed and much less smelly and noisy than crickets, not to mention nutritious.
IMPORTANT: Please be aware that we DO NOT recommend starting your own dubia roach colony. It is common for people to develop an allergy to dubia roaches with too much handling and constant exposure. You might save money long term, but it may not be worth the risk. Handling your dubia roaches in a well-ventilated room, and wearing gloves and a respirator can help reduce the chances of developing an allergy. Our facility has been equipped with high quality air filtration and ventilation systems, and we always wear gloves and respirators to keep the risk to a minimum. Please note that the reactions will start with itchy skin, then move on to itchy eyes, congestion, and ultimately lead to respiratory issues. Let us provide your dubia roaches as you need them with minimal exposure and risk of developing allergies.
If you would still like to start your own colony, keep reading:
Here is a basic step-by-step guide for how to start a dubia roach colony
1. Get a place to keep them
Your colony can be housed in a 10 gallon or larger aquarium or a 40 qt or larger plastic tub. Although dubia roaches don’t climb or fly, get a cover to keep them safe. For an aquarium, get a screen cover. Most plastic tubs come with covers. Use a hot soldering iron to make ventilation holes along the sides of the tub near the top (press the iron into the plastic), or cut a hole, at least 6″x6″ in the cover and glue a piece of screen on. The ventilation will also help keep the enclosure dry, which is essential for good roach care. Another good solution is to get a plastic drawer unit. It’s useful to have an extra tub to use when you’re cleaning your colony.
Examples of what to buy:
- 10 gallon tank
- Sterilite tub
2. Get heat
Dubia roaches produce best when kept at approximately 90 degrees F (32C). You can achieve this temperature by using an adhesive under tank heater, heat cable, or a ceramic heat emitter. Be sure to use a thermostat or a lamp dimmer with the heater so you don’t fry your roaches or melt your plastic container. Plug your heat source into the thermostat or dimmer and plug the thermostat or dimmer into the outlet. The thermostat dial can be turned to the proper temperature. You will have to experiment with the lamp dimmer to see where to set it. Use a thermometer with a probe to check the temperature and adjust the dimmer up or down until the temperature is correct. Most heat sources take about 6 hours to reach a reasonable temperature, but, in my experience, many will continue to increase gradually for a few days.
Examples of heat sources:
- ZooMed UTH
- zoo-med heat cable
- Ceramic heat emitter
- Thermostats and lamp dimmers
- Zilla thermostat
- Home Depot lamp dimmer
3. Provide a place for your roaches to stand
Your roaches need places to stand, or else they will crush each other. The best solution is egg crate –cardboard pieces that look like the cartons that come with the eggs you buy. Don’t use those cartons; they are frequently treated with chemicals that are bad for roaches. You can order egg flats directly from us. Stack the cartons in the enclosure, making sure that they don’t go all the way to the top so they don’t end up being roach stepping stones to the great outdoors.
4. Get nutritious food and no-spill water
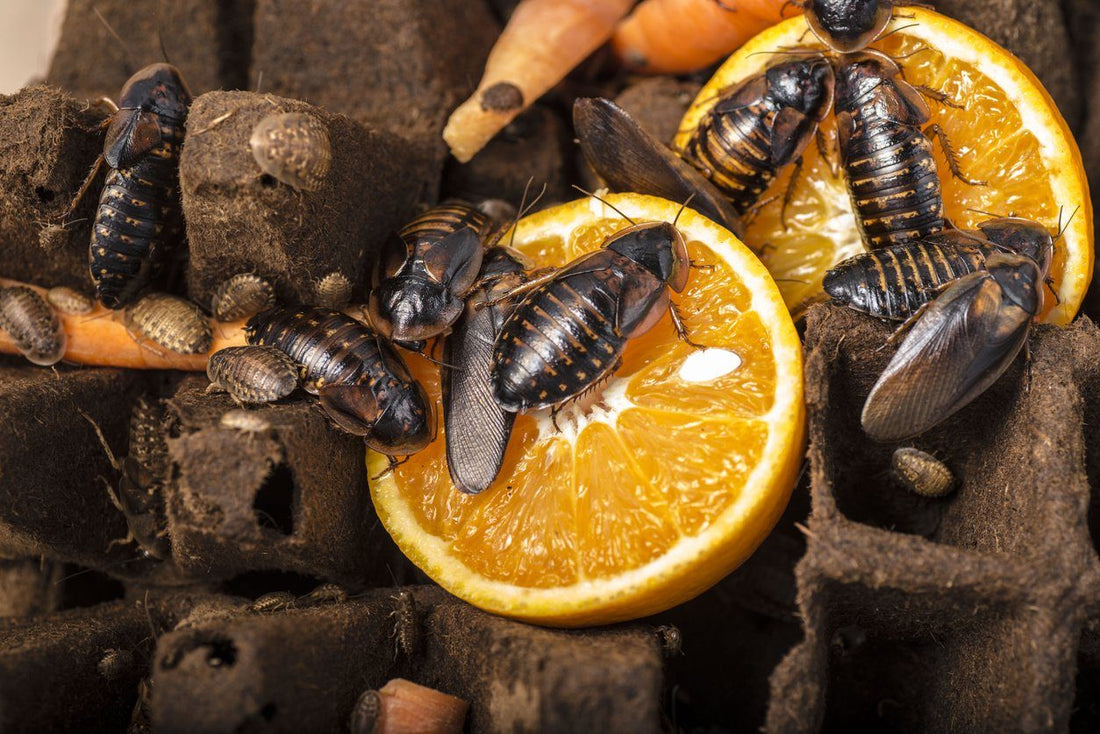
Food: Roach chow, cricket feed or any commercial gut load is good for roaches. Some people use dry dog food or chicken mash, but we do not recommend a meat-based protein blend. Lay in a supply in a place where it won’t get stale or moldy. You can supplement your roach chow with Organic fruit and vegetable peels such as carrot, apple or orange. Be sure to thoroughly wash your Organic produce before offering it to your Dubia.
Water: Roaches will drown in a dish of water. Either put a wet sponge in a dish, or get polymer water crystals and put them in a shallow bowl.
Now you’re ready to get the roaches!
Roaches have a life cycle, just like any other animal, including humans. A successful colony has:
- More females than males, because one male can impregnate multiple females
- A hefty number of breeding size roaches. Juvenile roaches (nymphs) are too young to breed, and old roaches are less productive
- Some nymphs that you won’t use as food. These will grow up to become your new breeders when your original breeders get too old
Have your enclosure, heat, egg crate, food and water set up before the roaches arrive.
Get the roaches from a reputable dealer. There are no special roaches for breeding. Get the same roaches you would use for food. Some dealers sell starter colonies which contain a group of young adult roaches in the proper male to female ratio. If you want to put your own starter colony together, get medium roaches so you know they are young and will be in top breeding condition. Start with at least 20 roaches, 5 male roaches (full wings) and 15 females (wing stubs only). The more roaches you start with, the more babies you’ll end up with.
You’re in business!
Put the enclosure in a quiet, dark place. Provide food and water regularly, clean out the enclosure every 1-2 weeks (see care instructions) and get ready for the hardest part of the whole enterprise: waiting.
If your roaches are already at breeding age, it should only take a few weeks for the first nymphs to appear. However, it can take 8-9 months for the colony to be numerous and stable enough for you to be able to use it exclusively for feeding your reptiles.
Do the math
As your roach colony grows, keep in mind that you want to have a 1:4 ratio of males to females and enough young adults to replace the breeders every 8 months or so. Check your colony regularly. Feed off the older (larger) females and the appropriately sized roaches for your reptiles. Keep track of the balance as you choose which roaches and how many to use as feeders.


